HVAC Manifold Gauge: The Complete UK Guide
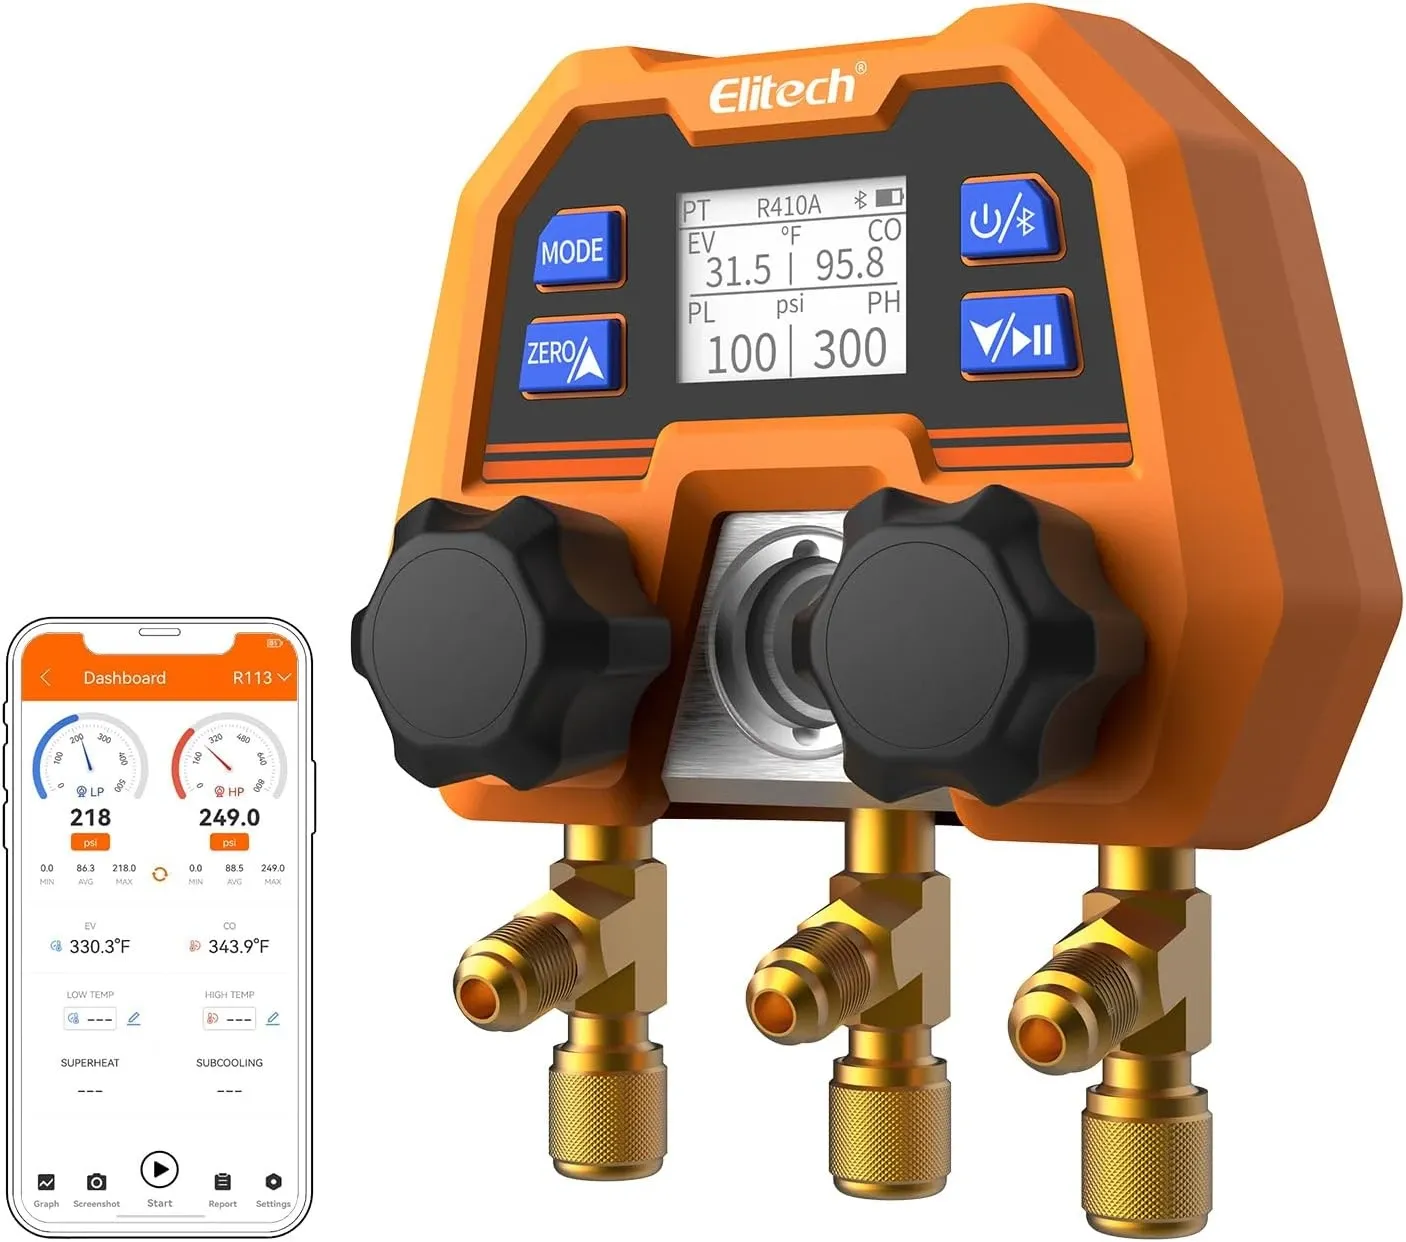
In short: an hvac manifold gauge is the two-gauge set an engineer connects to a refrigeration or air-conditioning system to read pressures and diagnose faults. The blue gauge reads the low (suction) side, the red gauge reads the high (liquid/discharge) side, and the yellow centre hose is for vacuum, recovery or charging. Convert those pressures to saturation temperatures for the refrigerant you are working on, then compare superheat and subcooling against the manufacturer's targets. This guide is written for engineers building their first proper kit in the UK.
If you have just qualified and you are about to run your first solo calls, the manifold gauge is the tool you will reach for on almost every job. It is worth understanding what it actually tells you before you spend a limited tool budget on one. The figures below use the ManifGauge Elitech DMG-4B digital manifold gauge as a reference point, but the fundamentals apply to any set.
What an HVAC manifold gauge set measures
A manifold is really a small pressure-routing block with two gauges and (usually) three hoses:
| Part | Colour | Connects to | What it tells you |
|---|---|---|---|
| Low side | Blue | Suction service port | Evaporating (suction) pressure — used for superheat work |
| High side | Red | Liquid/discharge service port | Condensing (head) pressure — used for subcooling work |
| Centre/service | Yellow | Vacuum pump, recovery or refrigerant source | Process routing only — not a diagnostic reading |
The gauges only give you pressure. The diagnosis comes from turning those pressures into temperatures for the specific refrigerant, which is where a pressure-temperature (PT) chart — or a digital gauge that stores the charts — earns its place.
How to read high- and low-side pressure
Connect the blue hose to the suction port and the red hose to the liquid/discharge port with the system running and settled. Read both sides, then work out the two numbers that matter:
- Superheat = actual suction-line temperature − the low-side saturation temperature (from the PT chart at your suction pressure). High superheat usually points to undercharge or a restriction.
- Subcooling = the high-side saturation temperature (from the PT chart at your head pressure) − the actual liquid-line temperature. High subcooling with high superheat usually points to a feed problem rather than a simple low charge.
Both calculations need a temperature reading from the pipe, so you will need a clamp thermocouple on the suction and liquid lines — the manifold alone cannot measure line temperature. A digital set that pairs with temperature clamps and calculates superheat and subcooling for you removes the arithmetic and the PT-chart lookups; that is covered in our smart manifold gauge guide. One golden rule: never add refrigerant on suction pressure alone — always confirm with subcooling.
Refrigerants you will meet in the UK
The refrigerant decides which PT column you read, so know what is in front of you. In UK field work in 2026 the common ones are:
- Split air conditioning and heat pumps: R32 and R410A. R410A is being phased down (new single-split systems under 3 kg with a GWP above 750 have been banned from the GB market since 2025), and R32 is now the standard fit on new equipment. See our air conditioning manifold gauge guide for AC-specific work.
- Commercial refrigeration: R404A, R448A, R449A and R134a, with the industry moving towards lower-GWP blends. See our refrigeration manifold gauge guide for cold-room and callout work.
- R22: fully phased out — you should not be charging it.
All of this sits under the GB F-Gas regulation, enforced by the Environment Agency: you must hold F-Gas certification to buy and handle these refrigerants, and leak-checking and record-keeping duties apply.
Analogue or digital for a first kit?
A well-made analogue set is reliable and cheap, and plenty of engineers learned on one. The catch for someone still building confidence is that you are reading a needle against a crowded scale and then doing the PT-chart maths by hand on site. A digital manifold gauge shows the pressures numerically, stores 90+ refrigerant profiles, and calculates superheat and subcooling once you clip on the temperature clamps — so your first readings are easier to interpret and easier to explain to a supervisor. For most newly qualified engineers, that clarity is worth more than the small saving on an analogue set.
What is in the box, and what you still need
A common first-kit question is what actually arrives and what you have to buy separately. A digital manifold gauge such as the DMG-4B handles the pressure side and the calculations, but a complete diagnostic kit also needs:
- Charging hoses rated for the pressures you work at (R410A and R32 run high).
- Temperature clamps for the suction and liquid lines — essential for superheat and subcooling.
- A vacuum pump and, for accurate charging, refrigerant scales.
- Leak detection appropriate to the refrigerant.
Budget for the temperature clamps from day one; without them the gauge can read pressure but cannot complete a superheat or subcooling check.
Choosing your first HVAC manifold gauge
If you are working to a tool allowance around £200, look for a set that: reads clearly at a glance, covers the refrigerants you will actually meet, and pairs with temperature clamps for automatic calculations. The ManifGauge DMG-4B sits at £170.79 inc VAT (£142.32 ex VAT), which leaves room in that budget for clamps and hoses, and it ships next day from the UK with a 30-day returns window — useful when you want to try a tool on a real job before you commit. Compared with premium names such as Testo or Fieldpiece, the trade-off is fewer ecosystem extras for a lower entry price; if you already own a premium ecosystem, weigh that up.
Honest boundary: where a manifold set stops
A manifold gauge is a diagnostic and charging tool, not a whole toolkit. It will not measure airflow, electrical faults or superheat/subcooling on its own without temperature clamps, and it will not tell you the correct charge without either subcooling data or weighing in. On systems with temperature glide (many blends), read the dew-point column for superheat and the bubble-point column for subcooling, or let a digital set handle it. If the numbers do not add up, trust the method — pressures, temperatures and the manufacturer's targets together — rather than any single reading.
Frequently asked questions
What does an HVAC manifold gauge actually do?
It connects to a system's service ports and reads low-side (suction) and high-side (liquid) pressure. Converted to saturation temperatures, those pressures let you work out superheat and subcooling and diagnose charge or airflow faults.
Do I need temperature clamps as well?
Yes for superheat and subcooling. The gauge reads pressure; the clamps read the suction- and liquid-line temperatures the calculations depend on.
Is a digital manifold gauge worth it for a newly qualified engineer?
For most people, yes: clear numeric readings, stored refrigerant profiles and automatic calculations shorten the learning curve and make your readings easier to justify. A reliable analogue set is a fair alternative if budget is very tight.
Building your first digital kit?
Shop the Elitech DMG-4B — £170.79Free UK next-day delivery · CE/UKCA/RoHS · 12-month warranty · 30-day returns